Introduction:
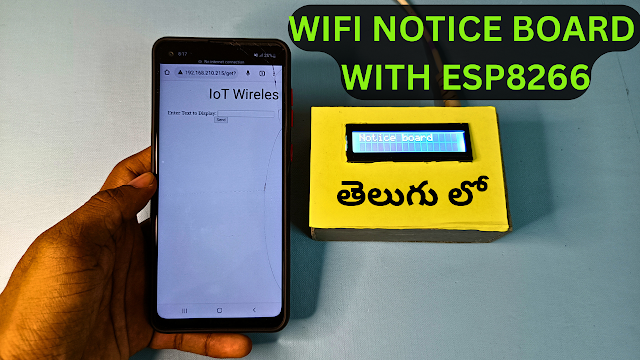
In a world driven by technology, creating a WiFi-controlled notice board adds a touch of innovation to your communication. In this comprehensive guide, we'll delve into the exciting realm of DIY electronics by showing you how to craft a WiFi-controlled notice board using the ESP8266 microcontroller and an I2C LCD. Seamlessly display messages and updates from any device, making this a perfect addition to homes, offices, or educational institutions.
Prerequisites:
Before you embark on this creative project, gather the following components:
ESP8266 Board: A versatile microcontroller with WiFi capabilities.
I2C LCD Display: A compact LCD for displaying messages.
Jumper Wires: For connecting the components.
Power Source: A suitable power supply for the ESP8266 and LCD.
Arduino IDE: The platform for programming and code upload.
Project Overview:
The goal of this project is to create a WiFi-controlled notice board using the ESP8266 and I2C LCD. You'll be able to send messages remotely and have them displayed instantly on the LCD. This project seamlessly blends convenience and technology, offering a dynamic way to convey information.
Circuit:
Code:
#include <ESP8266WiFi.h>
#include <ESPAsyncTCP.h>
#include <ESPAsyncWebServer.h>
#include <LiquidCrystal_I2C.h>
LiquidCrystal_I2C lcd(0x27,16,2);
AsyncWebServer server(80);
//replace ssid and password with your wifi network credentials
const char* ssid = "veera"; // your SSID
const char* password = "87654321"; //your WIFI Password
const char* PARAM_INPUT_1 = "input1";
const char index_html[] PROGMEM = R"=====(
<!DOCTYPE HTML><html><head>
<title>Smart Notice Board</title>
<meta name="viewport" content="width=device-width, initial-scale=5">
<p> <font size="9" face="sans-serif"> <marquee> IoT Wireless Smart Notice Board </marquee> </font> </p>
</head><body><center>
<form action="/get">
Enter Text to Display: <input type="text" name="input1">
<input type="submit" value="Send">
</form><br>
</center></body></html>
)=====";
void notFound(AsyncWebServerRequest *request) {
request->send(404, "text/plain", "Not found");
}
void setup() {
Serial.begin(115200);
lcd.init(); // initialize the lcd
// Print a message to the LCD.
lcd.backlight();
lcd.begin(16, 2);
lcd.clear();
lcd.setCursor(0, 0);
lcd.print(" Notice board");
WiFi.mode(WIFI_STA);
WiFi.begin(ssid, password);
if (WiFi.waitForConnectResult() != WL_CONNECTED) {
Serial.println("WiFi Failed!");
return;
}
Serial.println();
Serial.print("IP Address: ");
Serial.println(WiFi.localIP());
server.on("/", HTTP_GET, [](AsyncWebServerRequest *request){
request->send_P(200, "text/html", index_html);
});
server.on("/get", HTTP_GET, [] (AsyncWebServerRequest *request) {
String message;
String inputParam;
if (request->hasParam(PARAM_INPUT_1)) {
message = request->getParam(PARAM_INPUT_1)->value();
inputParam = PARAM_INPUT_1;
// lcd.clear();
lcd.setCursor(0,1);
lcd.print(message);
}
else {
message = "No message sent";
inputParam = "none";
}
Serial.println(message);
request->send(200, "text/html", index_html);
});
server.onNotFound(notFound);
server.begin();
}
void loop() {
for (int positionCounter = 0; positionCounter < 29; positionCounter++) {
lcd.scrollDisplayLeft();
delay(500);
}
}
Conclusion:
With the ESP8266 and I2C LCD at your disposal, you've embarked on a journey to create a WiFi-controlled notice board that combines technology and communication. As you send messages remotely and watch them appear on the LCD in real-time, you're experiencing the magic of innovation. This project not only showcases your technical skills but also adds a functional and aesthetic touch to your space. So, gather your components, follow the steps outlined in this guide, and create your very own WiFi-controlled notice board that brings your messages to life with a touch of modernity.


0 Comments